12.
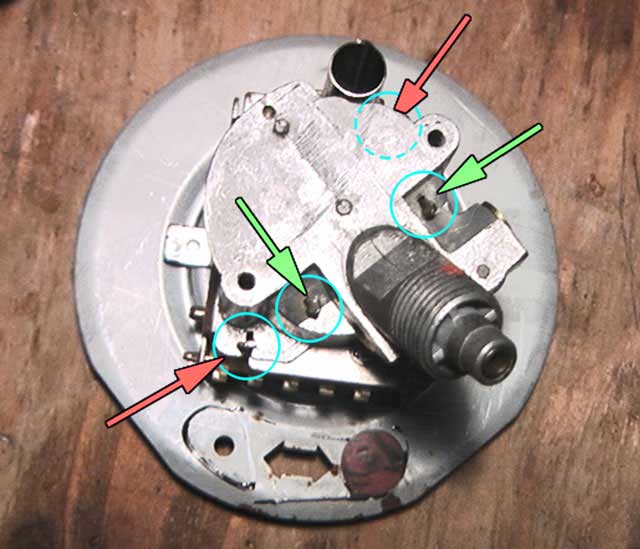
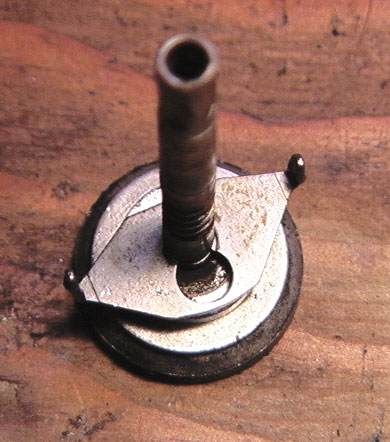
 The hub on the end of the needle spindle doesn't come off (this link says it does: 1) and is too big to pass through the hole in the dial face because there's a small metal grommet around the inside of the hole for the spindle. I think the grommet is supposed to be either a washer for the hairspring, or a sort of rivet to hold the pieces of the dial face together for assembly. It can be removed with some small side cutters (below). Don't cut the spindle shaft, only the grommet. It might not be a bad idea to put some tape across the dial face to protect it against scratches, I didn't and I now have scratches. It's paintable though. The hub on the end of the needle spindle doesn't come off (this link says it does: 1) and is too big to pass through the hole in the dial face because there's a small metal grommet around the inside of the hole for the spindle. I think the grommet is supposed to be either a washer for the hairspring, or a sort of rivet to hold the pieces of the dial face together for assembly. It can be removed with some small side cutters (below). Don't cut the spindle shaft, only the grommet. It might not be a bad idea to put some tape across the dial face to protect it against scratches, I didn't and I now have scratches. It's paintable though.
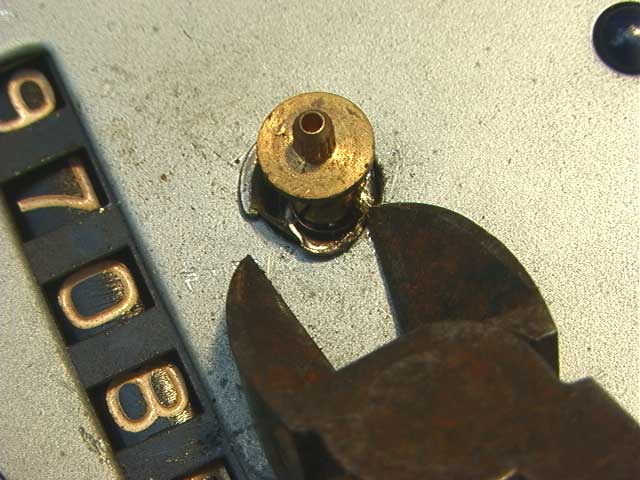
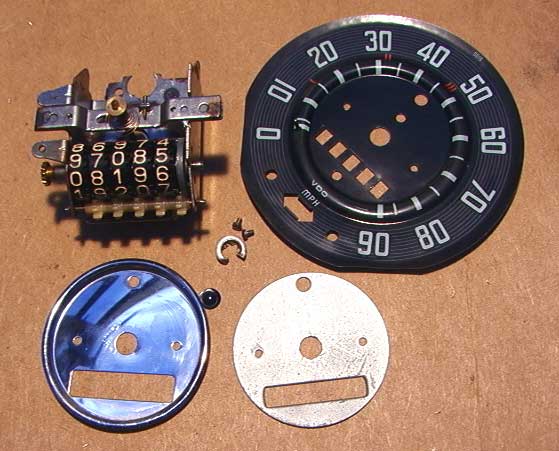
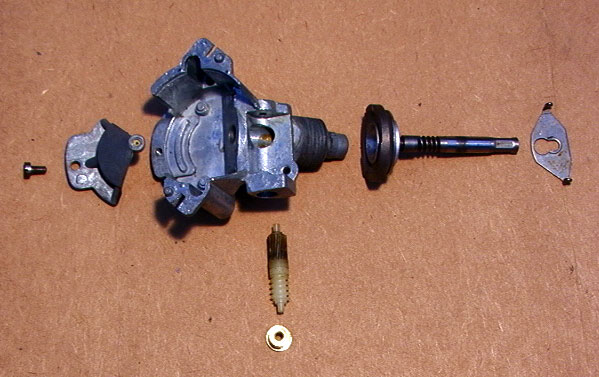
When the top edge of the grommet is removed or demolished, remove the two small screws in the dial face and it lifts off. Then you have the layout below. Cut the grommet in 2 places to remove it from the needle spindle. The little button thing that falls out is the blue glass high beam lens.
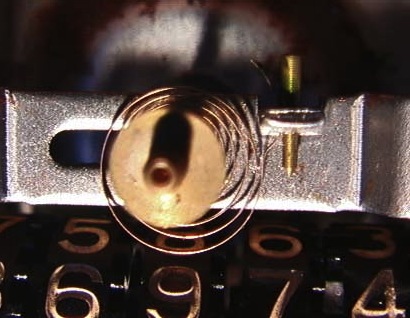
Below is the hairspring. The brass rod gizmo is tapered to wedge it securely to the frame. For fine adjustment: Press the rod out with pliers, the spring can be rotated to make the speed indicator more or less sensitive. Clockwise = more sensitive, CCW = less.
Reassemble it in reverse order, except forget the grommet behind the spindle hub, it doesn't really need it. The page on The Samba1 says to check out the position of the needle before you pull it off the spindle. That's a good idea, the few I've worked on have never erred less than the correct speed, always more. That's probably due to the needle being replaced incorrectly. If you align the needle so it's just barely touching the zero mph peg, it may require fine adjustments of the hairspring (see below). Note the position of the needle before you pull it off the spindle by lifting it carefully over the zero mph peg to see where it's neutral position is. Replace the needle pointing to the same place. It just presses on.
|
13.
This process below will alter the factory setting of the springs resistance and should only be used as a last resort. An indication of a bad adjustment will give a correct reading at say 25 mph but will be too high or low for 55. Record the initial tension/position with a digital picture of the peg showing the amount of spring protruding, or measure the protrusion with a micrometer, so you can put it back that way if it tests worse. (real programmers always backup the code).
If the accuracy really needs adjustment: put it all back in the dashboard except without the glass lens and faceplate, so you can access the spring from the drivers seat. Mark the dashboard with masking tape labels to show where 0, 20, 30, and 40 mph are. Drive it to a radar speed trap someplace that posts a big sign that says "Your Speed Is [ ]" (these are fairly common in the US, in some areas they're a driving hazard). Drive through a few times & finish adjustments there (while parked, right?) and perform the procedure below marked *. I've noticed the speed trap radar guns are not calibrated uniformly and they tend to show readings that are 4 or 5 mph slower than the factory settings on cars I've driven through them. This might be a bureaucratic attempt to keep road speeds down, or maybe it's just too expensive to coordinate police, car makers and radar gun manufacturers so everyone's on the same page. The point is: it might get you busted someday if you calibrate your speedometer by radar trap readings because you'll be going 5 mph faster, because if you speed up to 45 on your speedometer, you'll be going 50 to an outside (police) observer. I've been told that speed trap radar guns don't have to be certified like police radar guns, and they can be adjusted to suit the mood of the guy that installs them or that of the county or city traffic manager. BUT there's another way.
If you 1. worry about the accountability of radar gun installers, or 2. plan on cornering the market in rebuilt speedometers, or 3. are ashamed to be seen adjusting your speedometer in public (don't feel bad, many people are), or 4. are simply a (rich) geek:
- detach all years and models of aircooled VW speedometer cables from the left front wheel bearing grease cover by removing a tiny (losable) circle clip or cotter pin from the lower end. The end of the cable sticks out through a little square hole in the middle of the left front wheel bearing's grease cap (there's a hole through the axel like a pipe). You can attach a variable speed drill to this end but it's easier to see the dash if you pull the cable and housing completely out of the wheel through the back. You can then perform this adjustment in the privacy of your secret laboratory instead of on the side of the road like a common scumbag.
- Set the drill RPMs with a hand held tachometer.
RPMs should be = number of inches in a mile (63,360) divided by tire circumference (also in inches) x miles per hour.
Imperial: drill RPM = (63,360 / C) x MPH. (C = tire circumference measured in inches)
Metric: drill RPM = (100,000 / C) x KmPH. (C = tire circumference measured in cm)
* Once you're satisfied that the cable is turning at the right speed:
- with pliers, loosen the peg-pin securing the hairspring, press on the narrow end, don't pull.
- move the needle for the difference in speed between the radar or calculation, and the speedometer needle setting so the hairspring rotates slightly,
- push the peg-pin back in, just snug enough to hold the spring.
- pull the needle off the spindle and reset the needle pointing to zero.
- drive through the speed trap again to verify.
- press the peg in tight.
I've had some effect adjusting the springs resistance by bending the spring where it attaches to the frame but I don't advise it, because if the spring breaks you'll have to take it to a professional clock repair shop who'll charge more than the price of another used speedometer. It's safer to loosen the peg carefully using pliers. Put a towel below on your lap or across the steering column to catch the peg if it falls.
14.
If you found any glaring problems with the above descriptions, have a question, or feel that you should send me a large check, please email me at billcor at MCN dot org
While you're messing with the speedometer, put on an Oil Light Beeper, it'll save your engine someday. Also this
Exhaust Donut Hack.
|
|
Links:
The following is a list of possible search names to please google in such a way that I don't have to actually (somehow) incorporate them into the text so they make sense (which many don't), because often the words used in a search don't exactly match the page text and it's easier for Google to require everyone to conform than to accommodate them. So:
vw speedometer cable vw transporter camper vw camper vw wagon exhaust donut gasket exhaust manifold donut gasket vw beetle speedometer vw bug speedometer vw oil pressure relief valve beetle speedometer vw bug speedometer cable. see what I mean?
|
| | |


 but nobody sells them. (note: when the weather is damp, wood can soak up moisture and become heavier than plastic, so use a wood counterbalance too and seal it well)


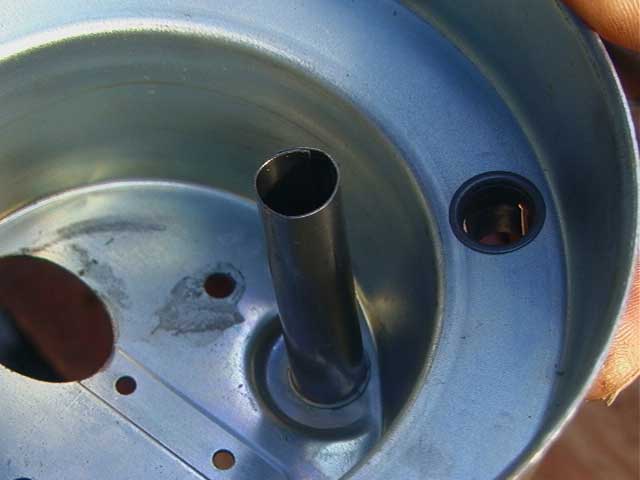
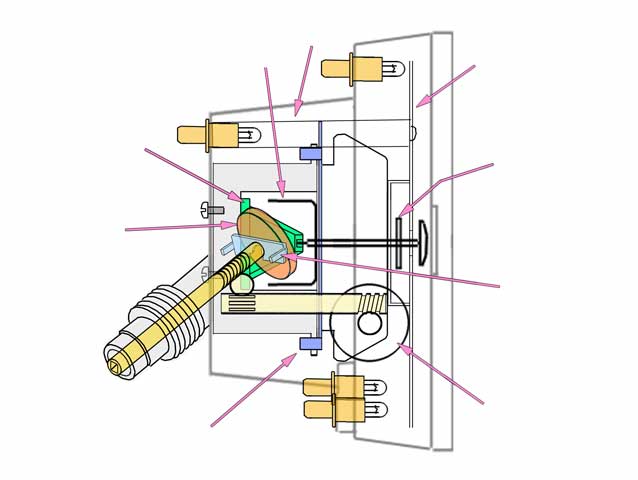
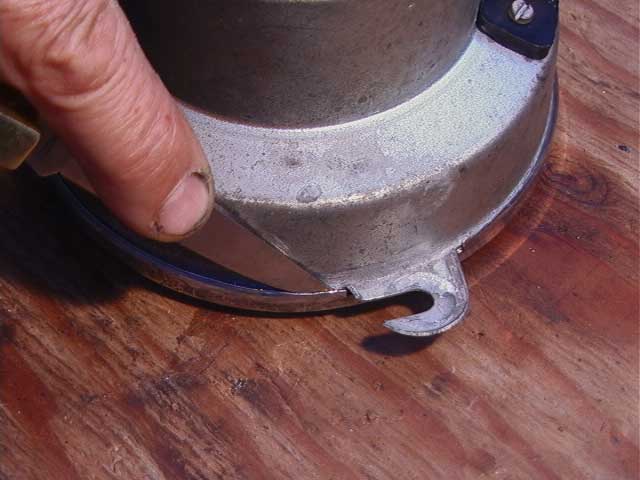
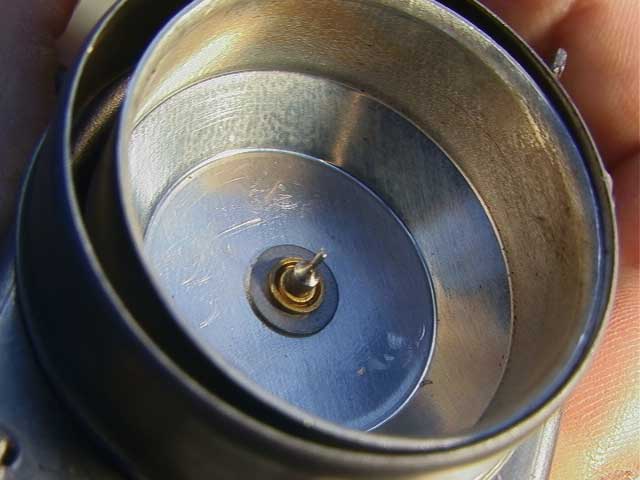
 Then the Cable socket / gear cover comes apart to separate the Wheel Magnet and Cup so it looks like the picture on the left. The half on the left is the Cable socket / gear cover. It holds the drive spindle/wheel magnet which should be greased maybe w/ vaseline or some hi-temp grease like they use for hot water faucets (small tubes available at Tru-Value hardware). Don't lubricate the pin hole in the middle of the left half.

No comments:
Post a Comment